Finally, a new post! I'm sorry about the hiatus. Not to worry, though, I'm back with a few projects I did during my absence.
This project is called a "wood gasifier camping stove". It's a portable, homemade stove, of the gasifier type. This means, that the thing you're heating is heated by hot gas that's created by the burning of a fuel source, in this case it's wood.
You'll need two food cans, one larger than the other. I used an empty ravioli can and a large can that held either peaches or pie filling. You need to keep the lid to the larger can and remove it with a safety can opener if you have one. If not, use a regular can opener sideways. The top rim needs to stay in tact.
As far as tools, I did mine without anything electric, but if you have a drill, it'll make things a whole lot easier. I used a piercing type can opener (sometimes called a church key), an awl (kinda like an icepick), tin snips, pliers, and a grinding stone.
This, That, and Awesome Crafts
Monday, July 23, 2012
Portable Wood Gasifier Camping Stove
Labels:
Crafts,
Functional
Monday, June 4, 2012
Framed Sunglasses Rack
I made a display for my sunglasses that hangs on the wall. It's artistic and functional, keeps them all in one spot, keeps them from getting knocked around and scratched up, and looks pretty nifty, too. I used the same idea as the framed note board a few posts ago, but added one key feature: an elastic band. I got this idea from a few blogs around the internet and kinda combined a couple different styles. Some used wire instead of elastic, some used an antique frame, most didn't keep the glass, some didn't even use any backing on the frame at all. I decided to keep the glass as I think it lend to a more "finished" or professional looking piece. If you have trouble with it (you'll find out why soon enough), feel free to scrap it and use it for some other project.
This project is a simple modification to the aforementioned marker board. Follow the directions to that project until you're about to put the wrapped back board back into the frame. Instead, cut the length of elastic that you think is appropriate. Your length depends on the size of your glass and frame, the thickness of your elastic, and desired tautness. It shouldn't be so taut that it's strained or the inner threads are very visible, but not so loose that it hangs or will arc under the weight of your sunglasses. I actually could've probably stretched it a smidgen more.
Center it between the glass and the frame so that when the glasses are on the elastic, they'll sit just in the middle, about one third of the way down in my case. When you have the desired location and tautness, tape the ends to the edge of the frame so you can press all the layers in on top of it and adjust them as necessary without having to redo your elastic.
Gently press the glass down around the edges, to make sure there aren't big gaps, and place the backing into the frame. Press around the edges gently as well, to get a tight as fit as possible. This will be tricky. With these additional materials being wrapped around the backing, it probably won't fit, but don't force it too hard. Just do your best. Remove the tape from the elastic and re-tape it to the backing, keeping the tautness in tact. Tape the back board into place when your satisfied with everything (just like with the note board).
Turn the whole thing over and admire your handiwork! Now you can mount it to your wall location of choice. I used a couple of poster mounting strips, like the kind on the back of removable wall hooks. They're right next to each other at the store, made by the same people.
Load up your sunglasses collection and you have a functional, conversation starting art piece!
Labels:
Crafts,
Functional
Wednesday, May 30, 2012
Water Bottle Greenhouses
Indoor gardening idea:
Instead of using seed starters and transferring the baby plant to
your planter or garden, plant the seeds directly in your planter. Cut
clear water or juice bottles a few inches from the bottom and place it over where you planted your seeds. Gently press into the dirt. Voila! Individual greenhouses until plants are big and strong enough to live without them.
Labels:
Functional
Monday, May 28, 2012
Framed Fabric Note Board (Marker Board)
http://pinterest.com/pin/39476934204131150/ |
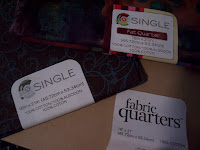
The blog that pin links to uses patterned decorative paper, which is going to be easier than my method. I decided to use fabric. My reasons being that I don't have patterned decorative paper laying around because it's expensive and I don't scrapbook. Plus, my frame is bigger than standard sheets of paper and I like the look of fabric better. I do happen to have a bunch of thin cotton fabric quarters. Whenever I go to Joanne's, even Walmart, I pickup a couple quarters, sometimes called, "Fat Quarters". They're only $0.99 at Walmart, less than 2 bucks at Joanne's. Keep in mind when choosing fabric that the design isn't so busy that you won't be able to easily read your notes.
If you do the easy method, simply find paper you like that's big enough for your frame and put it in. If not, you'll need a frame large enough for your purposes, thin fabric, scissors, fray check, dry erase markers, and pencil and masking tape (not pictured). The beauty of using masking tape instead of glue, or duct tape, is that if you want to change your fabric out, it's easy and damage free.
Labels:
Crafts,
Functional
Thursday, May 17, 2012
Crazy Eggs
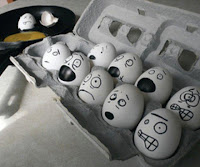
I wouldn't really classify this as a craft or do-it-yourself project. Just something to make you smile whenever you open the fridge or to do if you're super bored. I saw the internet meme to the right quite a while back and while my roommate was out of town a few weeks ago, decided I had to do my own version and surprise her.
It's super simple, just grab a sharpie and go to town! It took a few sessions because they'd build condensation after a few minutes and marker doesn't work on wet surfaces, duh. Anyway, I realize it's a silly thing to do, but it cracked me up at the time.
Here are my results:
Wednesday, May 16, 2012
Homemade Pop Tarts #2 / Homemade Hot Pockets
So, a while back I posted an entry about making pop-tart like pastries at home. I liked how they turned out for the most part, except I grabbed the wrong measuring spoon for the salt content in the crust... not so good. Not too long ago, I tried again, without so much making everything from scratch. At the same time, I decided to use the same method to make homemade pizza pockets. It was a bit experimental, so I only made two of each, in two different sizes.
It's super simple. Instead of making pastry crust, you open a can of ready-made crescent rolls, or croissants. Press two of the triangles together to get a rectangle and roll them out with a rolling pin to make them a bit bigger. Paint an egg wash all over the top of the pastry
For fruit filling, simply spread jam around the middle, leaving an edge. I think I did a layer of peach jelly and a layer of applesauce, 'cause I'm wild like that.
For pizza filling, spread with pasta sauce, leaving an edge. On half, top with cheese and your favorite toppings. I did olives, bacon, turkey, and artichoke hearts.
Wet your finger and moisten the clean edges, fold pastry over to cover, and press all edges to seal. (A fork dipped in flour works well). Brush the tops with egg wash. I also sprinkled cheese on the pizza pastries. Use a sharp knife or fork to poke holes in the top for ventilation.
Stick them in the oven (on a baking sheet lined with parchment paper) according to the temp on the croissant package, for the time stated, or until golden brown. This. picture is really light, they're a touch darker than it looks.
These are best served warm, but can be stored in a zip-lock baggie or Tupperware in the fridge for a few days.
I enjoyed these. The taste and textures were both delicious. They aren't as hold-in-your-hand friendly as the store bought versions, but tastier and not chocked full of preservatives. Enjoy!
Labels:
Fun Food,
Functional
Wednesday, May 2, 2012
Vinyl Record Bowl
For quite a while, I've had some old records that I had intended to make into bowls. Well, I finally did the project, but couldn't find the original tutorial that I had seen way back when. When I went to do this the other day, I found two different tutorials online, using two different methods. I mostly used the baking method but with some of the shaping aspects of the boiling water method. Which is, to shape my first bowl (first two pictures) I pressed the record between two mixing bowls. I also used a sauce pan to shape my second bowl (third picture), so it would turn out more like a tray style bowl.
I like how they turned out. I'm actually using the first bowl to hold fruit in my kitchen, and the second on a side table to hold snacks. The links to find out how to do it are at the bottom.
Links:
Baking: http://diyfashion.about.com/od/diyaccessories/ss/Record_bowl.htm
Boiling: www.skullsandponies.com/2012/03/how-to-make-bowl-from-vinyl-record.html
Labels:
Crafts,
Functional
Subscribe to:
Posts (Atom)