 |
| http://pinterest.com/pin/39476934204131150/ |
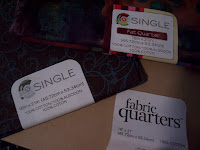
The blog that pin links to uses patterned decorative paper, which is going to be easier than my method. I decided to use fabric. My reasons being that I don't have patterned decorative paper laying around because it's expensive and I don't scrapbook. Plus, my frame is bigger than standard sheets of paper and I like the look of fabric better. I do happen to have a bunch of thin cotton fabric quarters. Whenever I go to Joanne's, even Walmart, I pickup a couple quarters, sometimes called, "Fat Quarters". They're only $0.99 at Walmart, less than 2 bucks at Joanne's. Keep in mind when choosing fabric that the design isn't so busy that you won't be able to easily read your notes.

If you do the easy method, simply find paper you like that's big enough for your frame and put it in. If not, you'll need a frame large enough for your purposes, thin fabric, scissors, fray check, dry erase markers, and pencil and masking tape (not pictured). The beauty of using masking tape instead of glue, or duct tape, is that if you want to change your fabric out, it's easy and damage free.
First, mark off your fabric. I used the frame itself as a guide and marked the edges with a pencil, wrong side of the fabric up. Then cut it out.
Apply Fray Check to the edges of your fabric. This amazing product does just what it sounds like, it keeps the edges from fraying without sewing or additional cutting with fancy scissors. This will soak through (it's supposed to), so always do it on a piece of cardboard. Let it dry. It shouldn't take more than 15 minutes.
Take the back off the frame (discard picture of fake family) and line it up on the wrong side of the fabric, so there are equal edges. Fold a long side over and tape the middle. Do the same to the opposite side, pulling somewhat tight, but not so tight that the board bends or the fabric skews. Then do the same to the shorter sides. If you know anything about canvas stretching or framing, you already know what to do. Keep going, back and forth, until you get to the corners.
Press the fabric on each side of the corner to the other side, so that they meet at about a 45 degree angle, and press the top down, so you have a square. Tape it down.
It'll look a little messy, but that's okay, it's the back. It should look something like this:
The next part is just a tad tricky. Place the back board back into the frame. It won't want to fit anymore so you have to try and press it gently into place, without bending the board. Tape it down, because the holds that are on the frame, probably won't fit over the board, plus you want even pressure all around to ensure it looks good from the front.
If this technique doesn't sit well with you, there are a few fixes you could try. You could try to shave down two of the edges, so the back board is a hair smaller and fits after fabric placement. You could also mount the fabric directly to the board with spray adhesive and trim the fabric so it's flush with the board. This, however, will make it permanent. You couldn't easily change the fabric.

I'm pretty happy with the results. It's handy for dry erase markers and post-it notes. After I made this, I used the same technique to make a sunglasses rack/holder. It'll be one of my next posts. Here's how my note board turned out:


No comments:
Post a Comment